Exploring the Magic Cube: Expanding Magic Squares into the
Third Dimension
Mathematics is a realm of exploration, and one of its most
captivating aspects is the study of magic squares. For centuries, magic squares have fascinated mathematicians due to their symmetry, structure, and the
beauty that emerges when numbers are intentionally arranged. In a magic square,
the sum of the numbers in each row, column, and diagonal is the same, resulting
in a perfect equilibrium. But what occurs when we apply this concept beyond two
dimensions and delve into three-dimensional objects? This is the realm where
the Magic Cube becomes relevant.
While I was immersed in Magic Squares, I began to ponder
whether the same principles could be applied in three dimensions. I asked
myself, “What if we could construct a Magic Cube similarly to how we create a
Magic Square?” This thought sparked a deeper inquiry into higher-dimensional
structures and a more profound comprehension of number theory.
Understanding the Magic Cube
At its core, a Magic Cube is a three-dimensional
counterpart to the Magic Square. Whereas a magic square features numbers
organized within a two-dimensional grid, a magic cube requires arranging
numbers in a cube, or three-dimensional grid, while ensuring that the sums
across each row, column, and diagonal in all three dimensions are equal.
I started by creating a 3x3x3 magic cube, which
contains 27 numbers (ranging from 1 to 27). Utilizing the Magic Sketch concept
I had previously devised for Magic Squares, I could visualize the distribution
of numbers within a three-dimensional framework. The challenge lay in ensuring that the rows and columns of each layer, as well as the diagonals traversing the entire three-dimensional cube, conformed to the same summation principle.
Magic Sketch: The Basis for the Magic Cube
The Magic Sketch is a technique for systematically
organizing numbers within a geometrically structured format. In the case of a magic square, this means utilizing a grid to visualize the placement of
numbers. I employed a 3x3 Magic Sketch for my Magic Cube to outline where the
numbers 1 through 27 would fit. This framework guided the arrangement of numbers within the 3x3x3 cube, ensuring that each number was positioned according to the
principles of symmetry and balance in mathematics.
Mathematical symmetry is essential in constructing Magic
Cubes because it requires that numbers be arranged so that the totals along
every row, column, and diagonal across all three dimensions remain constant.
While the design of a 3x3 magic square is relatively straightforward, expanding
this idea to include a cube presents additional difficulties, particularly
regarding diagonals that cross through multiple layers.
________________________________________
Progressing to the 4x4x4 Magic Cube
After successfully creating the 3x3x3 Magic Cube, I felt
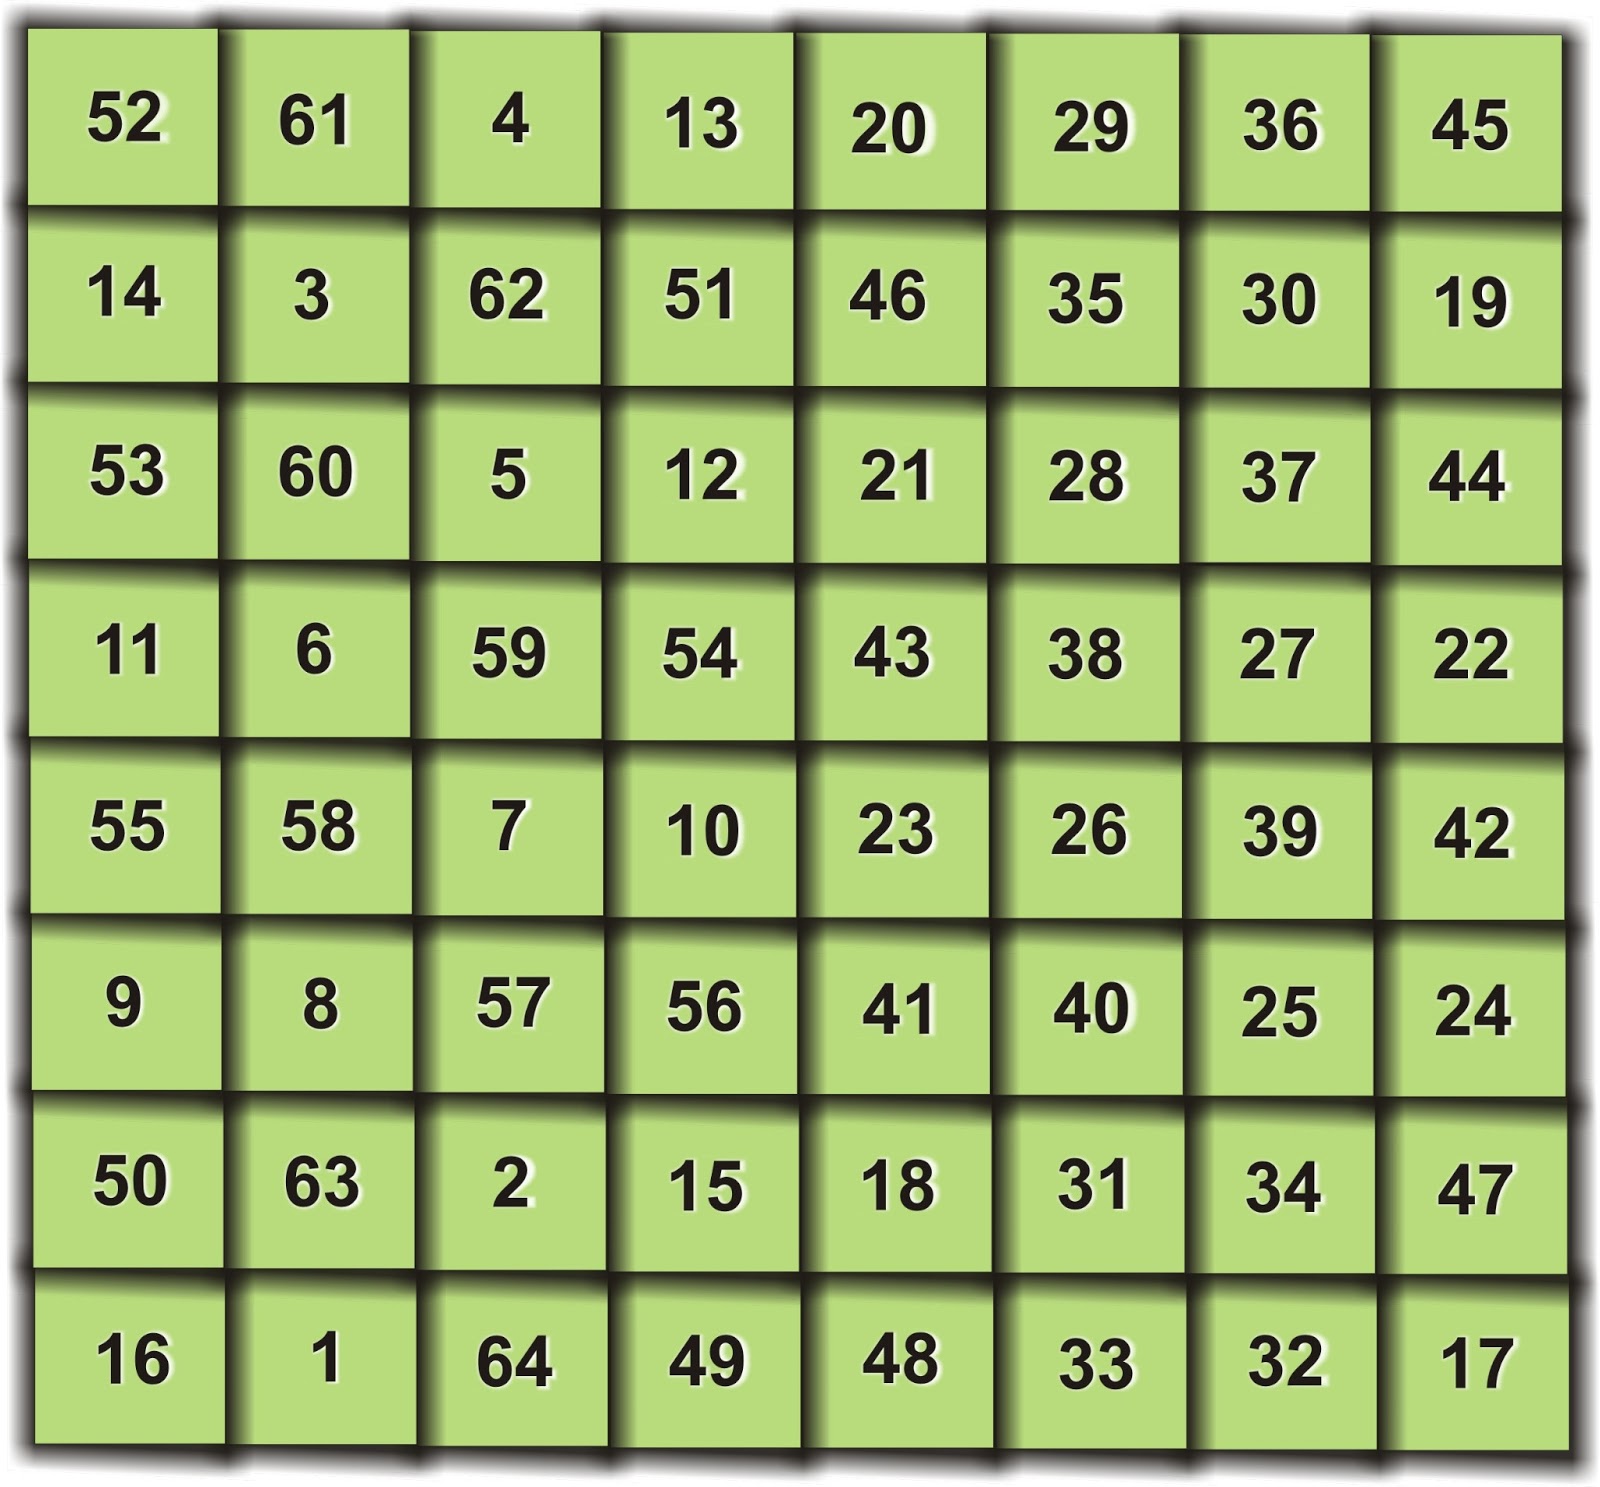
motivated to expand the concept and explore a 4x4x4 Magic Cube, a larger formation that incorporates numbers from 1 to 64. Developing this cube demands a
more sophisticated Magic Sketch of 4x4, which outlines the placement of these
64 numbers in a four-dimensional grid. The 4x4 Magic Sketch is a visual aid in
comprehending how the numbers function within the cube and ensuring their
arrangement follows the same order and symmetry principles.
Similar to the 3x3x3 cube, the aim is to ensure that the
sums of the numbers in each row, column, and diagonal throughout all four cube
layers are uniform. The 4x4x4 Magic Cube presents greater complexity and
provides an intriguing challenge within higher-dimensional number theory. It
necessitates carefully considering both arithmetic progressions and advanced
notions of higher-dimensional geometry.
________________________________________
Imagining the 4x4 Magic Cube: The Magic Sketch
To construct the 4x4x4 Magic Cube, we initiate the process
by utilizing the 4x4 Magic Sketch as our reference. The sketch serves as a
grid-based blueprint, enabling us to visually arrange the numbers from 1 to
64, adhering to the same sequence and principles that govern the Magic Square.
This visualization instrument is crucial for understanding how the numbers are distributed throughout the cube, ensuring that they align correctly and that the
totals are consistent in every dimension.
The 4x4 Magic Sketch simplifies the intricate task of
building the Magic Cube into a more manageable and comprehensible sequence,
transforming a complex mathematical problem into a more attainable endeavor.
Key Concepts and Keywords in Constructing Magic Cubes:
1. Magic Square—A two-dimensional layout of numbers in
which the sums of all rows, columns, and diagonals are identical.
2. Magic Cube—A three-dimensional counterpart of the
Magic Square, where the totals of the numbers in every row, column, and
diagonal across all layers are consistent.
3. Magic Sketch—A visual method used to organize and
outline numbers in a systematic, grid-like arrangement to maintain symmetric
properties.
4. Symmetry in Mathematics—The characteristic of a system
where elements are arranged to reflect or balance each other, creating an
overall sense of equilibrium.
5. Higher-Dimensional Structures—Mathematical entities or
ideas that extend beyond the usual two or three dimensions, such as the Magic
Cube and other multi-dimensional arrays.
6. Number Theory—Examining the properties and
interrelations of numbers, especially integers, plays a vital role in the
formation of magic squares and magic cubes.
7. 3x3x3 Cube—The initial stage of the Magic Cube,
composed of 27 numbers organized within a three-dimensional framework.
8. 4x4x4 Cube—A more intricate variant of the Magic Cube,
consisting of 64 numbers arranged in a four-dimensional setup.
9. Diagonals in 3D—These relate to the lines connecting
numbers across multiple layers of the cube, which must also comply with the
same summation principle as the rows and columns.
10. Arithmetic Progressions—A series of numbers where the
difference between consecutive elements remains constant, frequently used to
create magic squares and cubes.
________________________________________
Conclusion: The Enchantment of Elevated Dimensions
Delving into the Magic Cube is an intriguing exploration
into higher-dimensional mathematics. By employing the Magic Sketch method, we
can transpose the elegance and symmetry of the Magic Square into the
three-dimensional realm. This enhances our understanding of number theory and deepens our appreciation for the mathematical harmony that exists in higher dimensions.
Through these experiments with Magic Cubes, we unveil new
paths for discovering mathematical beauty, providing opportunities for more
sophisticated and innovative problem-solving. Whether arranged in a 3x3x3 or a
4x4x4 configuration, the Magic Cube remains a source of fascination and
challenge for those eager to delve into the intersection of art, mathematics,
and symmetry.

Step-by-Step Process to Create the Magic Cube
-
Define the Structure:
-
We will create a Magic Cube of order 4x4x4, which involves 96 numbers (1 through 96).
-
The cube consists of 6 square faces, and each face will be divided into a 4x4 grid, which will contain 16 numbers. These 16 numbers on each face will be strategically placed to ensure that the sums of the numbers across rows, columns, and diagonals on each face, as well as along the cube's axes, remain consistent.
-
-
Organize the Numbers:
-
Number Sequence: We will arrange the numbers from 1 to 96 across the 6 surfaces of the cube. Since the Magic Cube has 6 faces, and each face will hold 16 numbers, the total number of numbers will be 96 (6 x 16 = 96).
-
Magic Sketch Placement: Begin by placing the numbers on one surface using the Magic Sketch of 4x4 (as previously discussed for a 4x4 grid). Then proceed to fill the remaining surfaces while maintaining the mathematical relationships.
-
-
Strategic Number Placement:
-
Start by placing the number 1 at the designated starting point on one face (let's call it Face A).
-
Proceed sequentially, filling the numbers 2, 3, 4, ..., 16 along the row, column, and diagonal within Face A. Use the principles of symmetry and the Magic Square methods to maintain a balanced arrangement.
-
Once Face A is filled, move to the adjacent face (Face B) and continue the process, ensuring that the placement respects the Magic Cube’s symmetry.
-
Repeat this process for all six faces of the cube. The numbers should flow seamlessly across faces while ensuring the sums along the rows, columns, and diagonals of each face, as well as along the cube’s overall dimensions, remain constant.
-
-
Maintain Diagonal Consistency:
-
Pay special attention to the diagonals of the Magic Cube. For example, the main diagonal that spans from one corner of the cube to the opposite corner must adhere to the sum consistency rules, just like the diagonals in the Magic Square.
-
The sum of numbers across all rows, columns, and diagonals must be the same for the entire cube.
-
-
Visualize the Cube:
-
As you work, visualize the Magic Cube as a 3D object. Imagine connecting the numbers from one face to another, ensuring that the sequences are consistent across adjacent faces.
-
Example Diagram of the Magic Cube
Below is a conceptual representation of the 4x4x4 Magic Cube, illustrating how the numbers 1 to 96 are distributed across the cube’s six faces. Each face is a 4x4 grid, and the numbers flow logically across the cube.
Final Concept of the Magic Cube
In this Magic Cube, the numbers 1 through 96 are systematically distributed across the six faces. The placement adheres to the principles of Magic Squares and extends them into three dimensions, ensuring that the sums of the rows, columns, and diagonals are the same for each face as well as across the entire cube.
To summarize:
-
Step 1: Define the cube’s dimensions (4x4x4, containing 96 numbers).
-
Step 2: Use the Magic Sketch of 4x4 to guide the placement of numbers on each face.
-
Step 3: Ensure the sums of rows, columns, and diagonals on each face remain consistent.
-
Step 4: Maintain the sums along the cube’s axes, making it an actual Magic Cube.
-
Step 5: Visualize the arrangement in 3D for optimal balance and consistency.